iOS: https://apps.apple.com/app/libib/id721908216
Android: https://play.google.com/store/apps/details?id=com.libib.app
Step 1: Add Collection

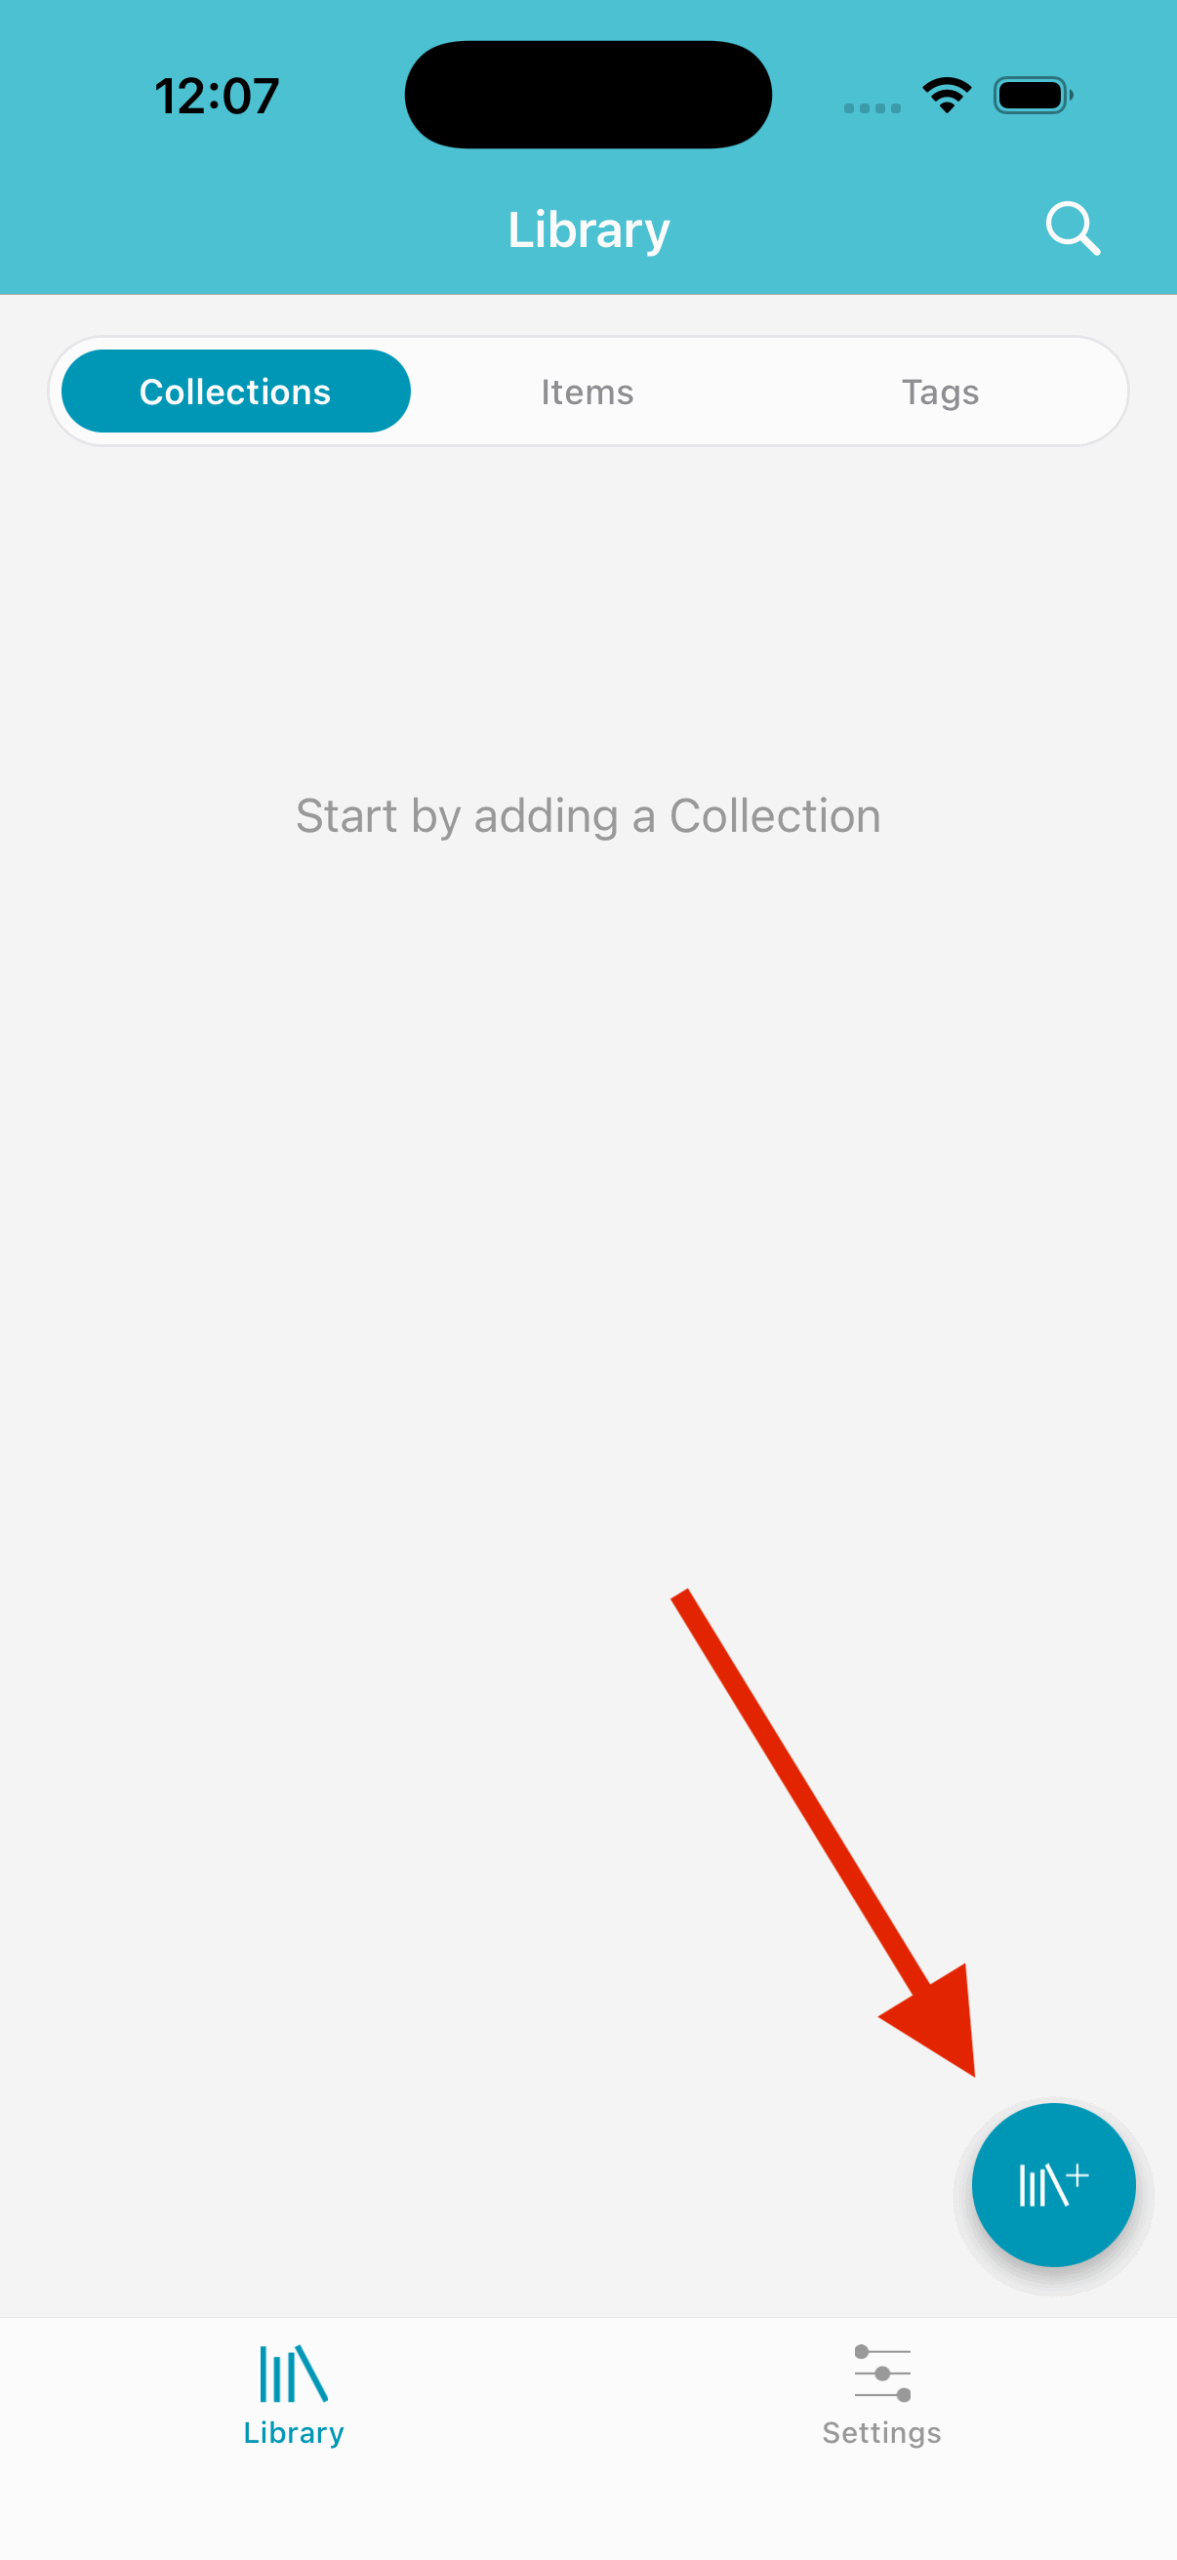
After you’ve created your account and logged in you’ll be greeted with your collections page. First you must create a collection before you can begin adding items.
Start by clicking the III\+ icon in the bottom right corner of the Collections tab.

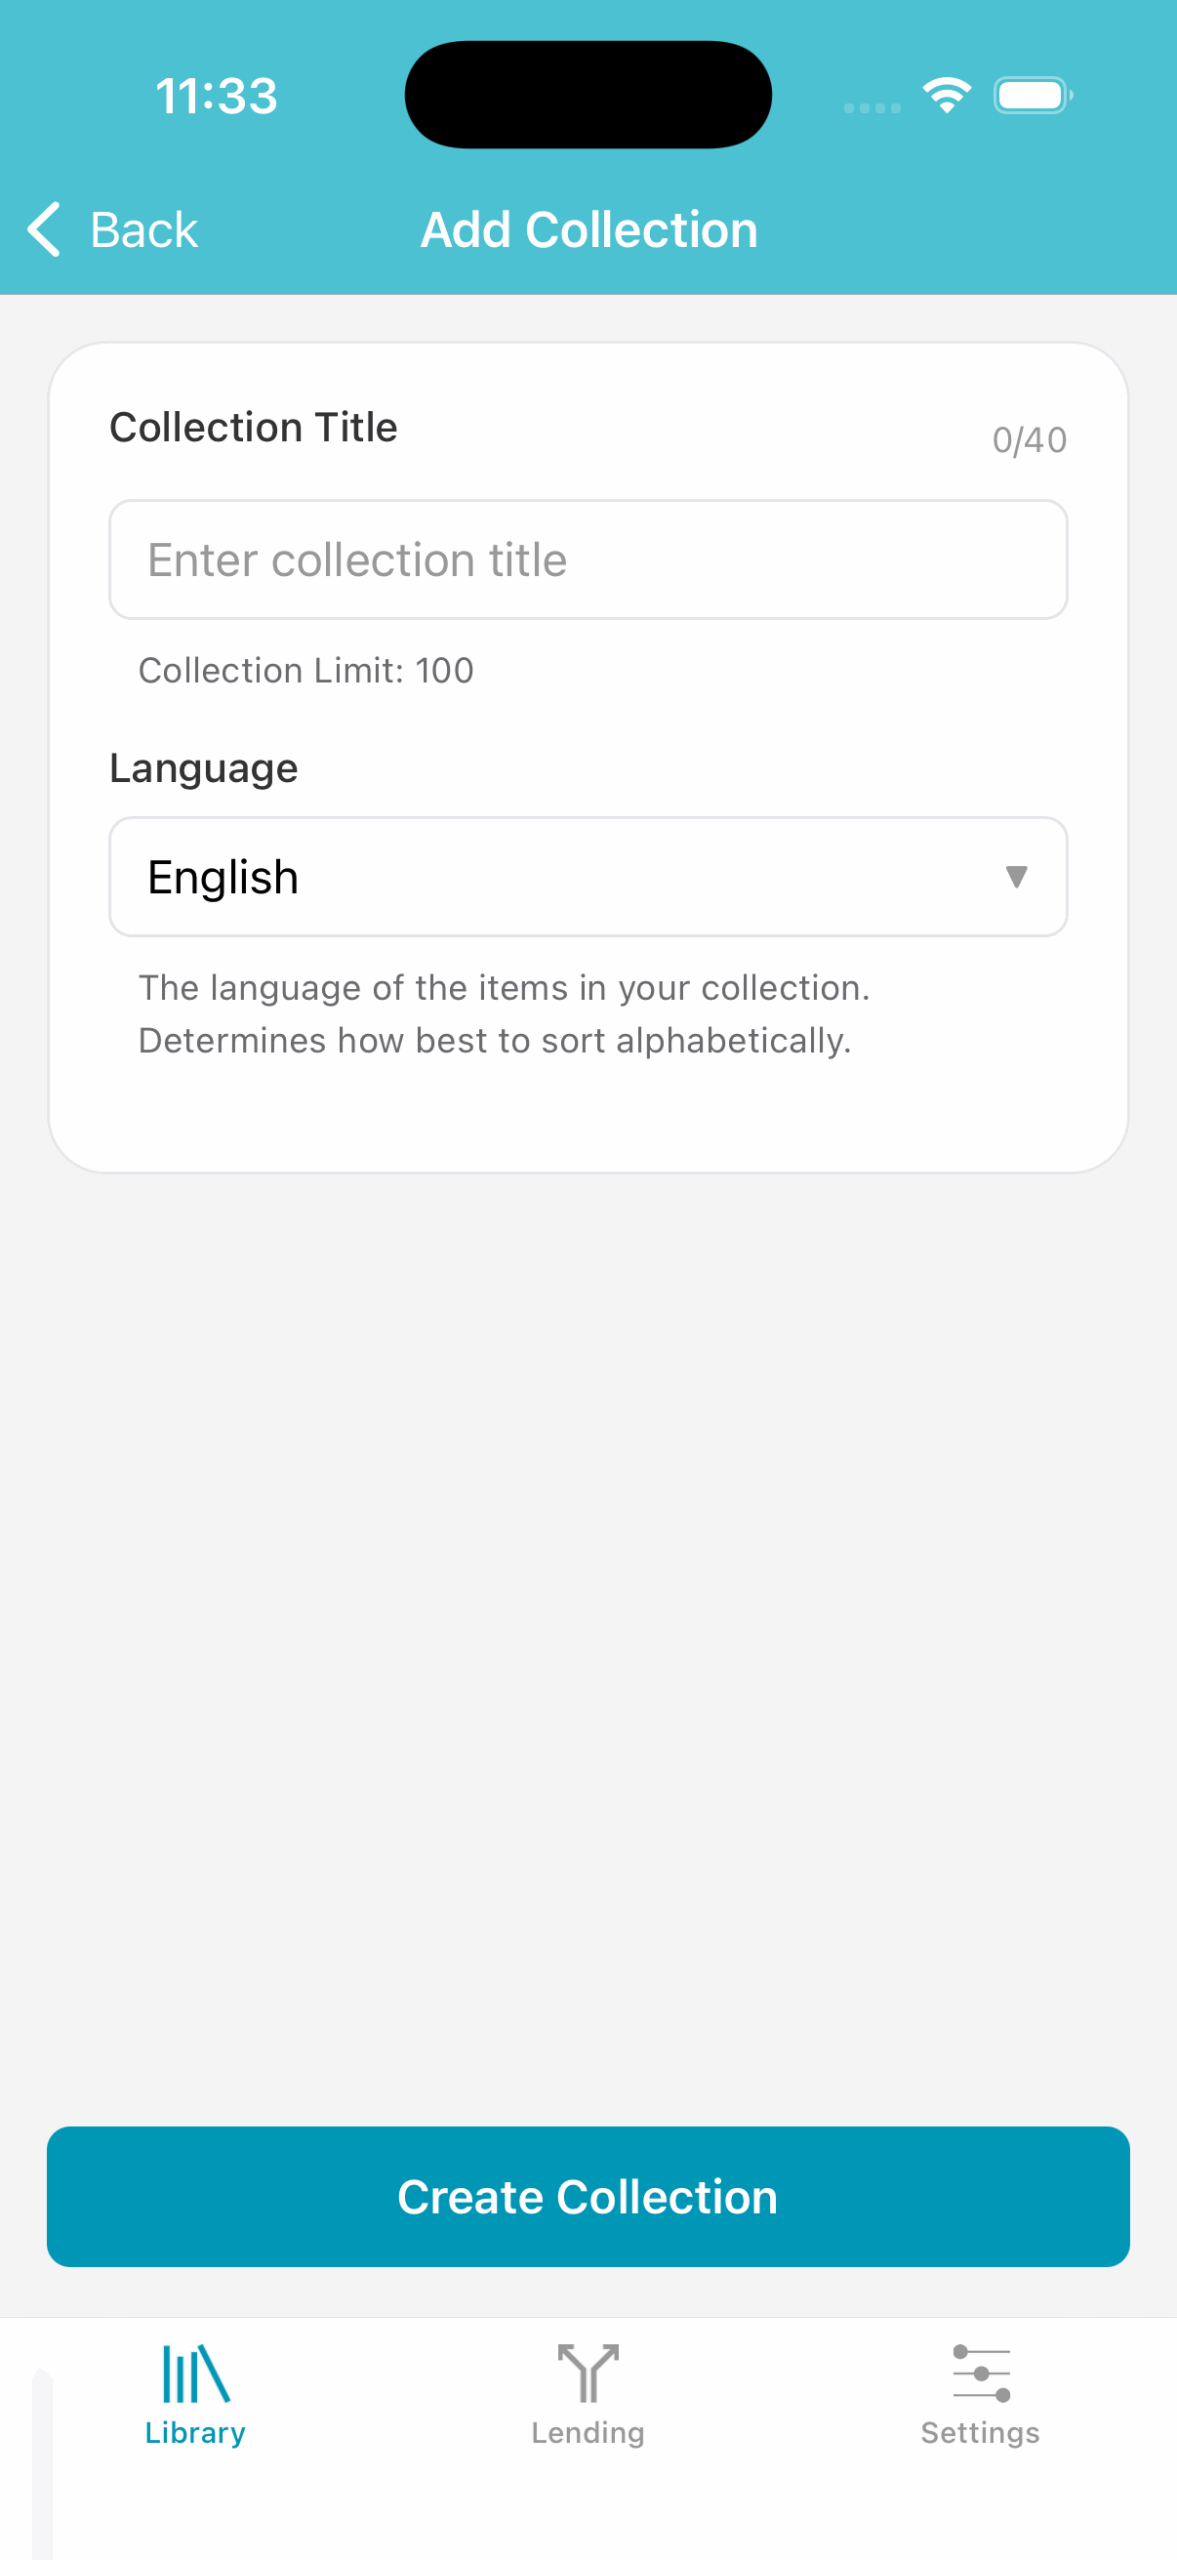
The Add Collection form will appear.
- Type a title
- Select a language. The language is used to determine how your library should be sorted.
More on adding a library here: Add Library
Step 2: Add Items
Now that you’ve created your first collection you’re ready to begin adding items. This is where our fast and accurate scanner comes into good use. Select your newly listed collection from the list on the Collections tab and another dialog will appear with instructions. Tap OK to accept and begin adding items.

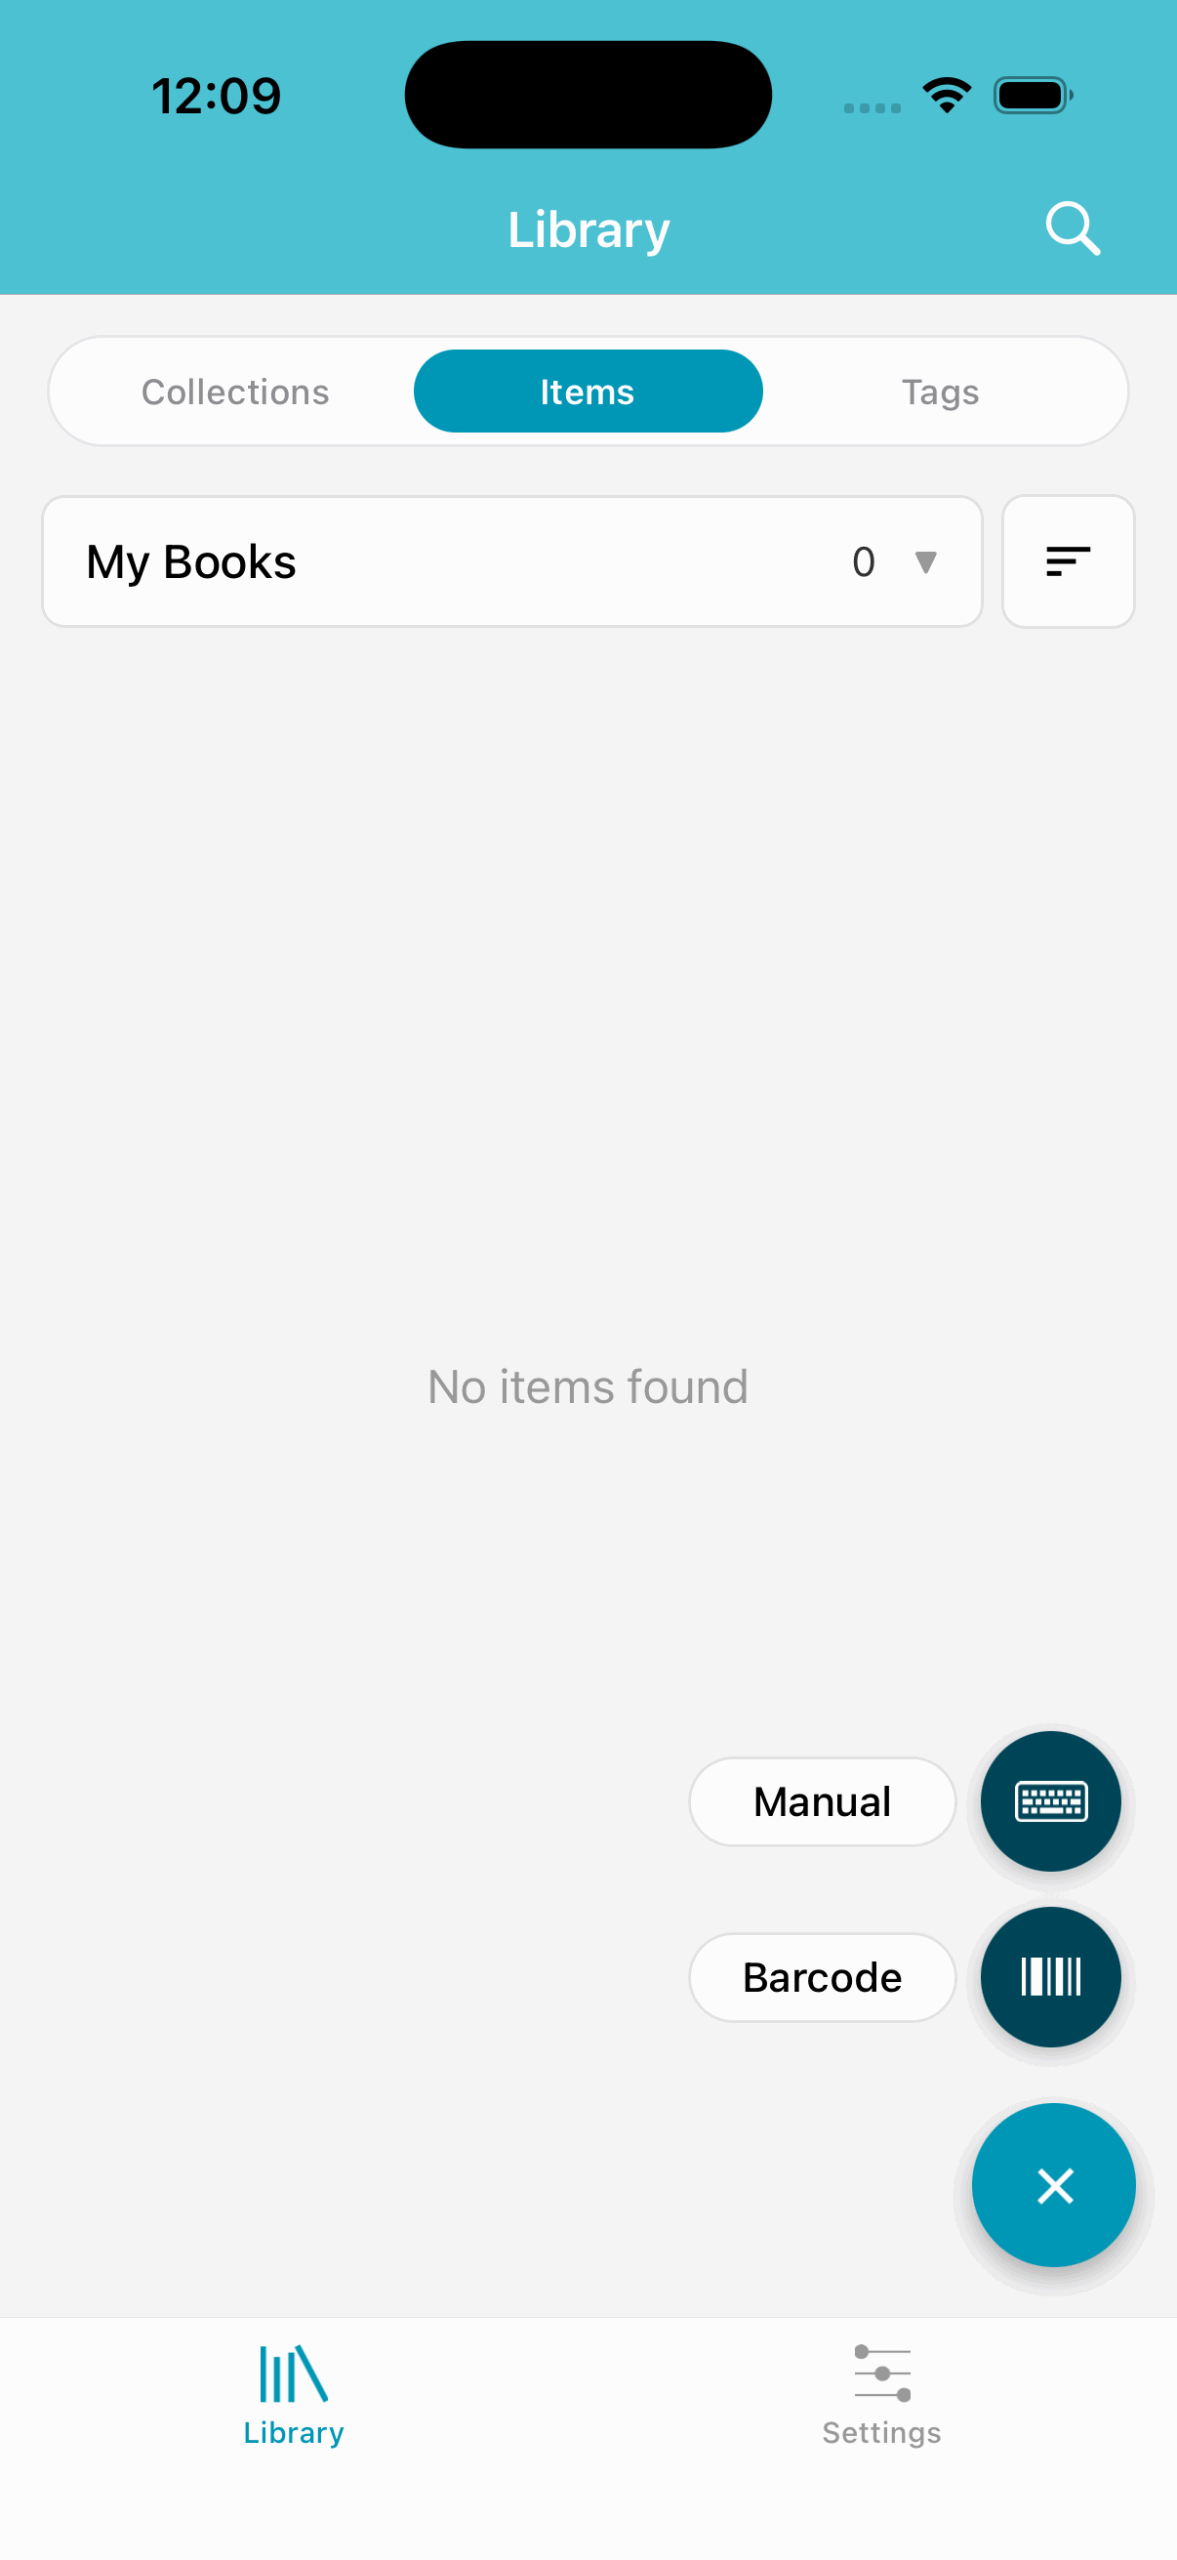
Click the + icon in the bottom right corner right above the tab bar. This will turn it into an x (which will close the dialog when tapped, if you choose to cancel). The dialog will give you two options: Barcode and Manual Entry.
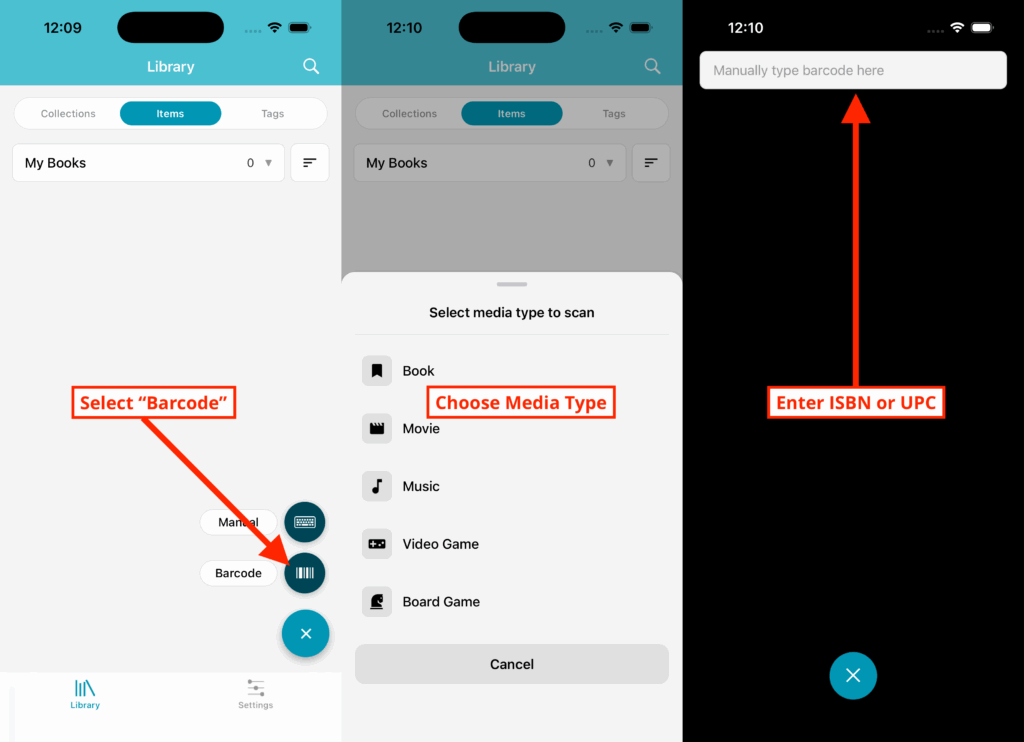
Selecting Barcode will bring up media type options. Select the media type you want to add a the scanner will popup allowing you to scan items into your new collection.
ISBN lookup can be performed by entering the ISBN or UPC barcode number in the field above the scanner. (See image below)
Manual Entry can be used for rare/antique items without an ISBN or UPC. This feature allows you to manually enter data for each field.

Now that you know the app basics checkout the website for more features.
Additional Help Resources
