Step 1: Add Collection
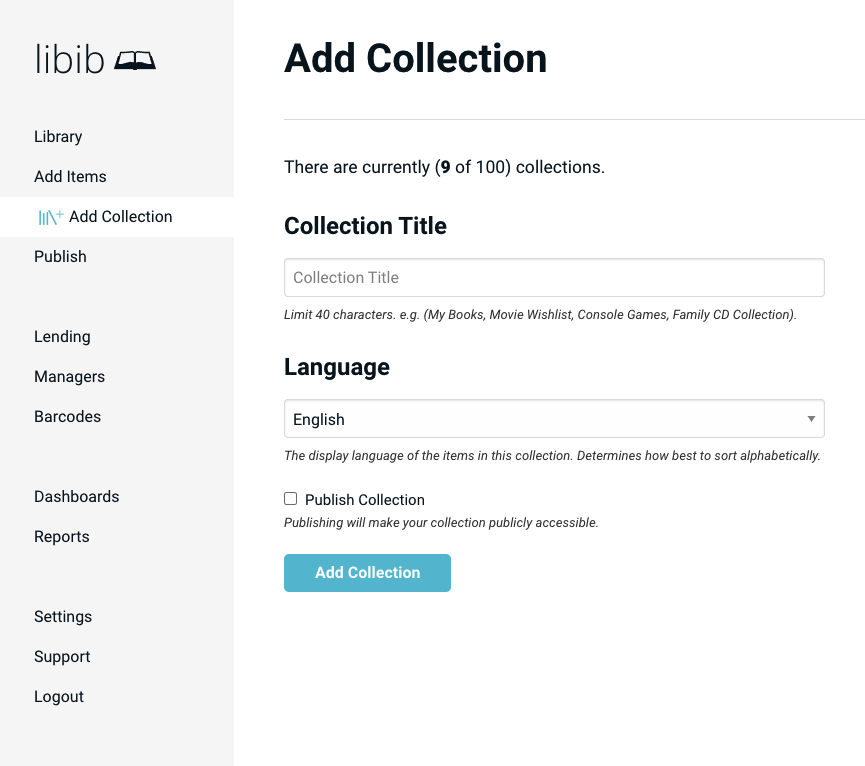
After you’ve created your account and logged in you should navigate to the Add Collection screen. This is the first step to begin cataloging your items.

- Select a title This will be the name of your collection (previously known as a library).
- Select a language This should be the primary language used for this collection and will assist with sorting. You cannot change this setting after the collection is created. You can create up to 100 collections so you can keep languages in separate collections if you want.
- Choose to optionally publish your collection. Publishing your library will make it public. Unchecking will keep your library private. Publishing your collection is currently the only way to share your library with others.
Step 2: Add Item
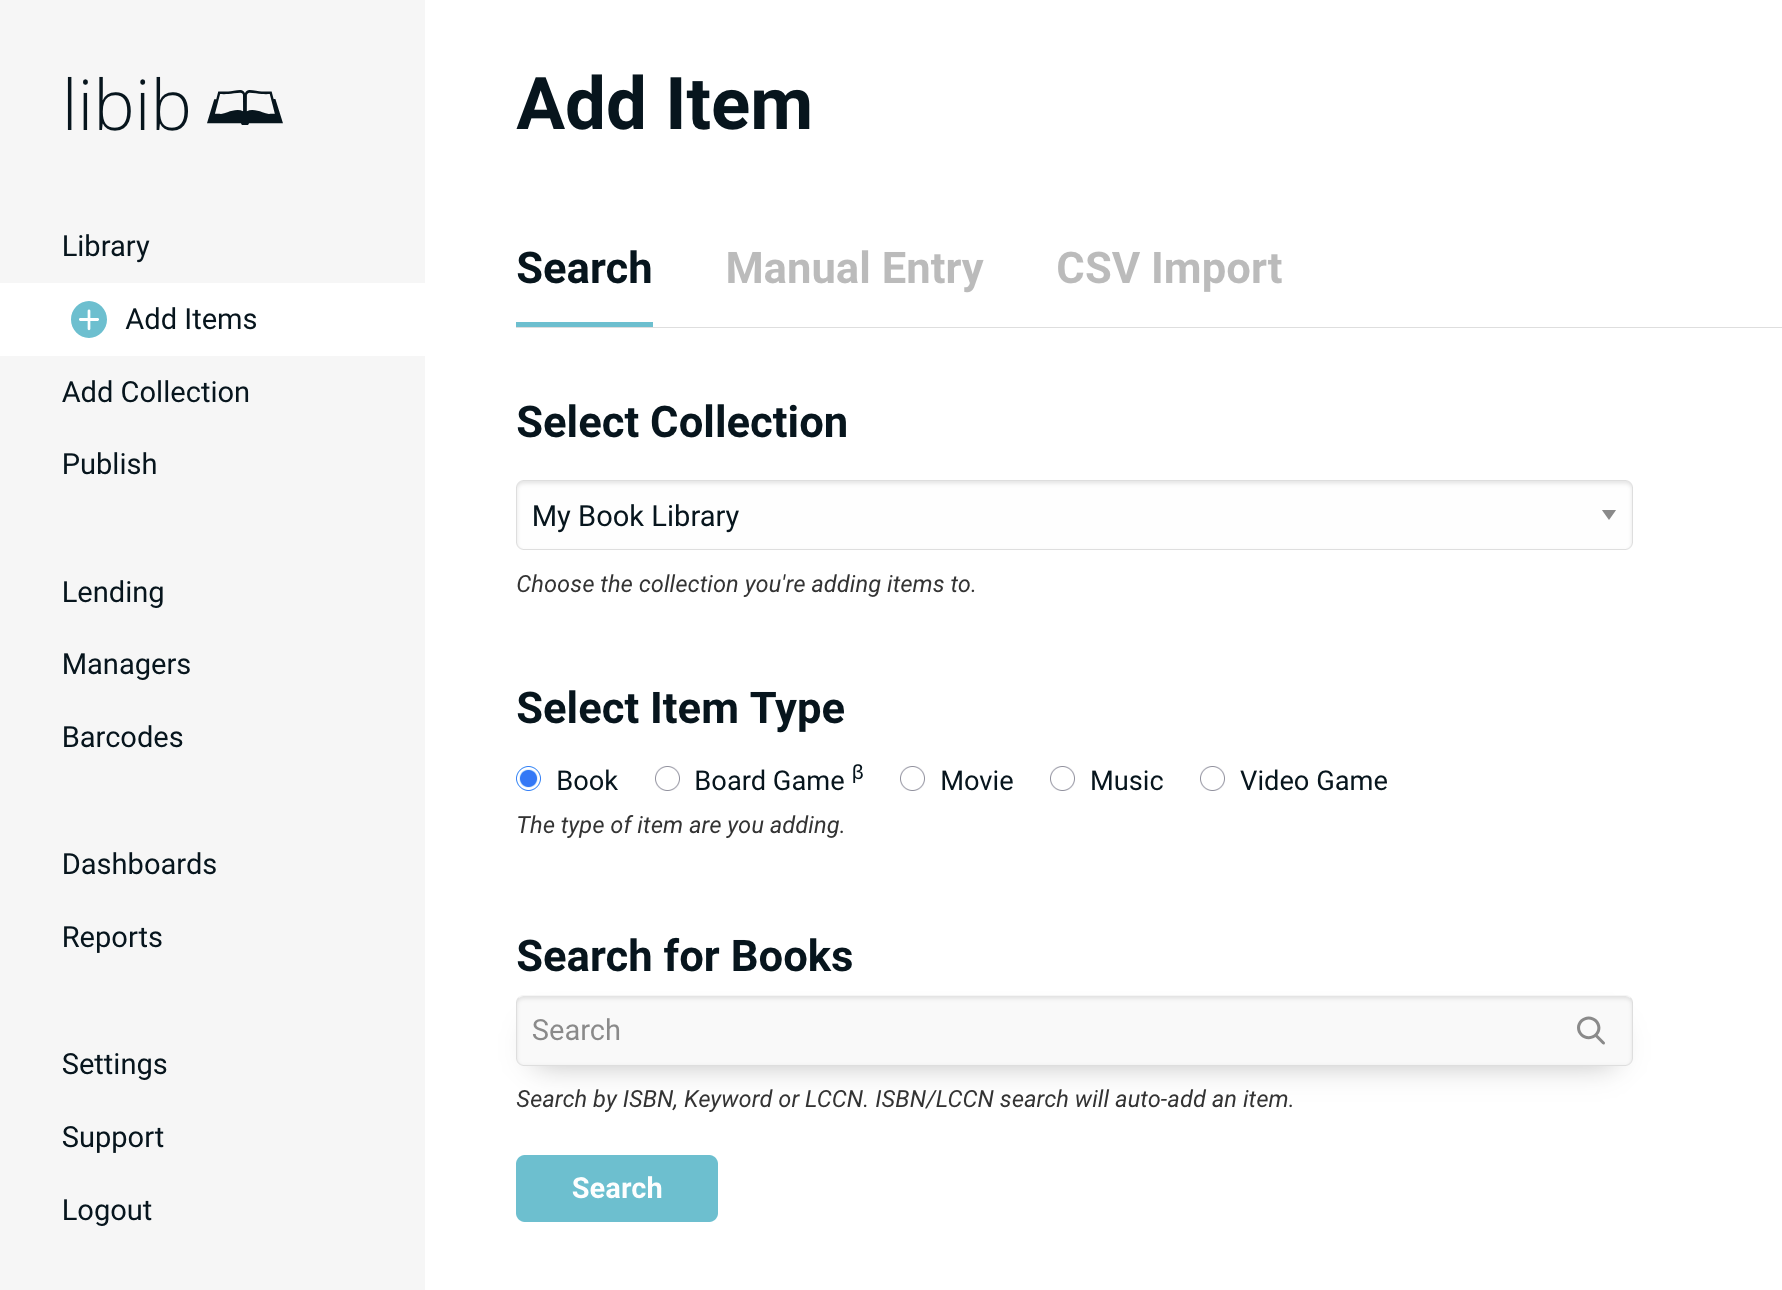
Now that you’ve created your first library you’re ready to begin adding items. Click “Add Items” in the left sidebar. Here you can select the collection you want to add items to and what type of item you’re adding (books, board games, movies, music, or video games).
- Search – look up items by ISBN, UPC, Keywords, or LCCN (LCCN is PRO only)
- CSV Import – detailed guide CSV import guide.
- Manual Entry – this method should be reserved for rare/antique items without an ISBN or UPC. Here you can manually enter the data for each field.

Step 3: Publish to make a Public Site
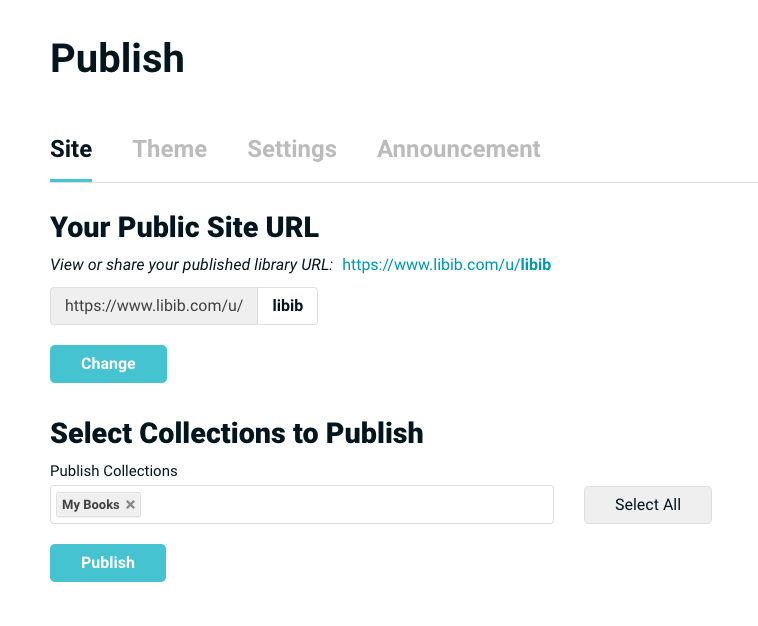
You’ve added our items now you can optionally setup your published site. Here you can assign your public site URL which is the link you will use to share our collections with others. To find your unique URL click on “Publish” in the left sidebar. At the very top of the Publish page a your link is displayed. If you don’t see one you’ll need to assign an alias and save to create your URL.
In the Select Collections to Publish input field, you’ll want to select the individual collections you want to be available on your published site.


Step 4: Public Site Theme & Settings
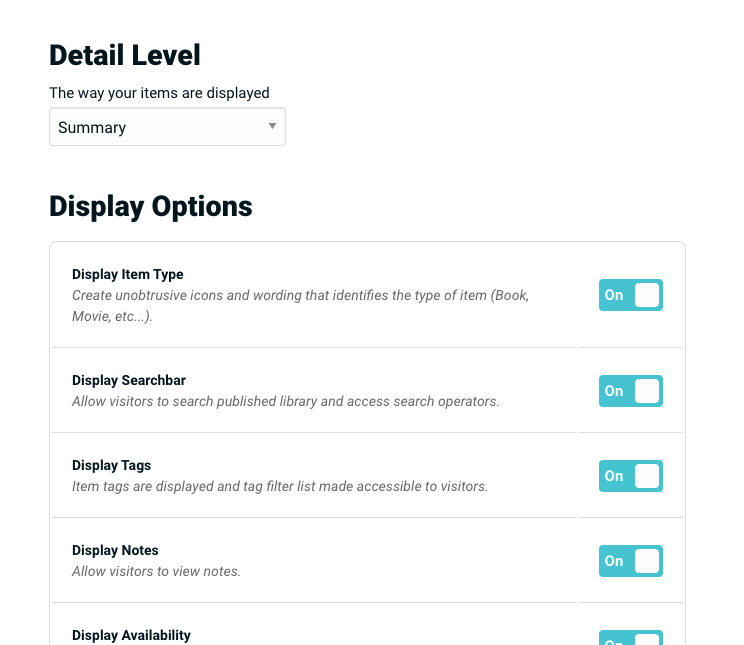
Use each of the tabs across the top of the Publish page to setup your theme, logo, lending settings, and announcement (welcome message). The additional settings are located here: Theme, Settings, and Announcement.
Step 5: Mobile App
If you haven’t downloaded the mobile app at this point make sure you do! It’s an excellent companion for scanning in items or handling lending features as a Pro user.
Additional Resources
