Lending Pro
Libib's lending feature offers a full circulation system that allows managers to check items out/in, set due dates, place holds, manage patrons, and view lending history.
Lending
The lending landing page lets you check items out, place holds, or check in items for patrons.
Lending > Lending

Search for an item to checkout (or place a hold), either using the title, the creator name, the ISBN/UPC or the custom barcodes that Libib creates for each copy of an item. If entering in a barcode, and there is only one result, Libib will automatically add the item to the checkout queue (See #3).
If more than one result is found, Libib will return up to 6 results for your to choose from. If your search returns more than 6 results, you will need to use the custom barcode to retrieve the specific copy.You can manually change the default
Checked OutandDue Dateby clicking on the actual date. A pop-up dialog will come up and let you make edits.The queue of items that will be checked out, or placed on hold for a patron. You can remove an item from the queue by clicking on the "x" on the top right of the item.
Search for the patron that will be having items checked out to (or placed on hold), using their custom barcode, name, email address or their patron ID.
Once a patron is selected from the search drop-down, they are shown beneath the patron search input. A patron's name, email, custom barcode, the number of current checkout and held items, as well as their patron ID (bottom right of patron box) are displayed.
Once a patron is selected, you are given an option to place the items in the queue on hold. All items in the queue will be placed on hold if the
Place Holdbutton is selected. This will reserve a copy of the item in the system for later checkout.Once a patron is selected, you are given an option to check the items in the queue out. All items in the queue will be checked out if the
Checkoutbutton is selected.Check In Modewill open a slide-in page where you can quickly scan items to check them in. (More info below)
Adding Unavailable Items
Item Checked Out
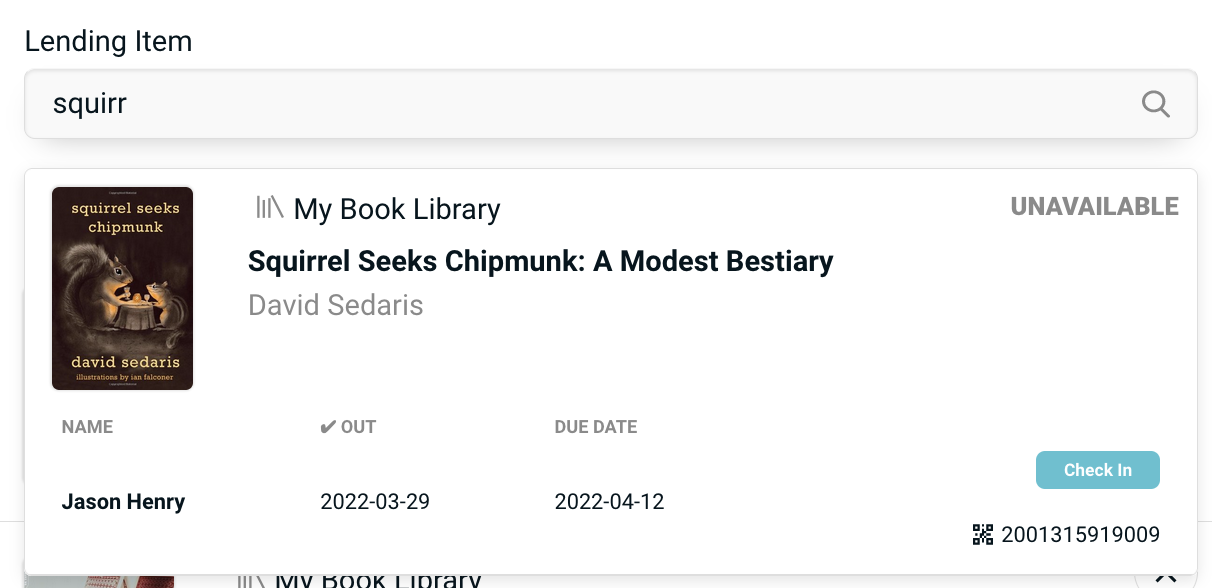
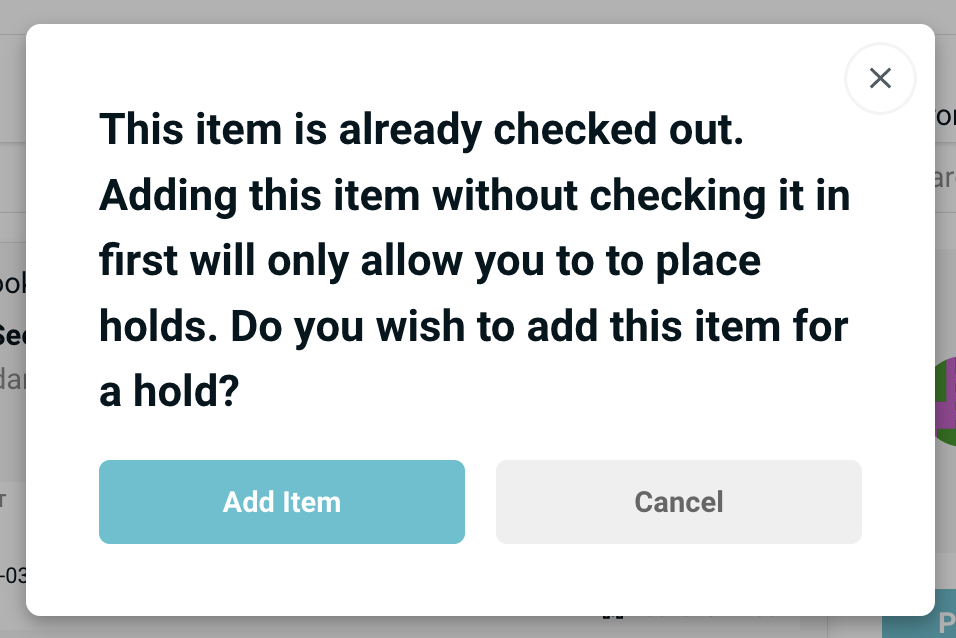
When attempting to add an item that has already been checked out a warning dialog appears. If you choose to add the item anyway to the queue, you will only be allowed to place a hold on the items in the queue. You cannot check out items that are already checked out.
Notice that the item in the drop down view marks itself as unavailable, but also gives the option to check the item back in by clicking the Check In button. So if you wish to check the item in you can do so from this page without having to navigate away.
Item On Hold
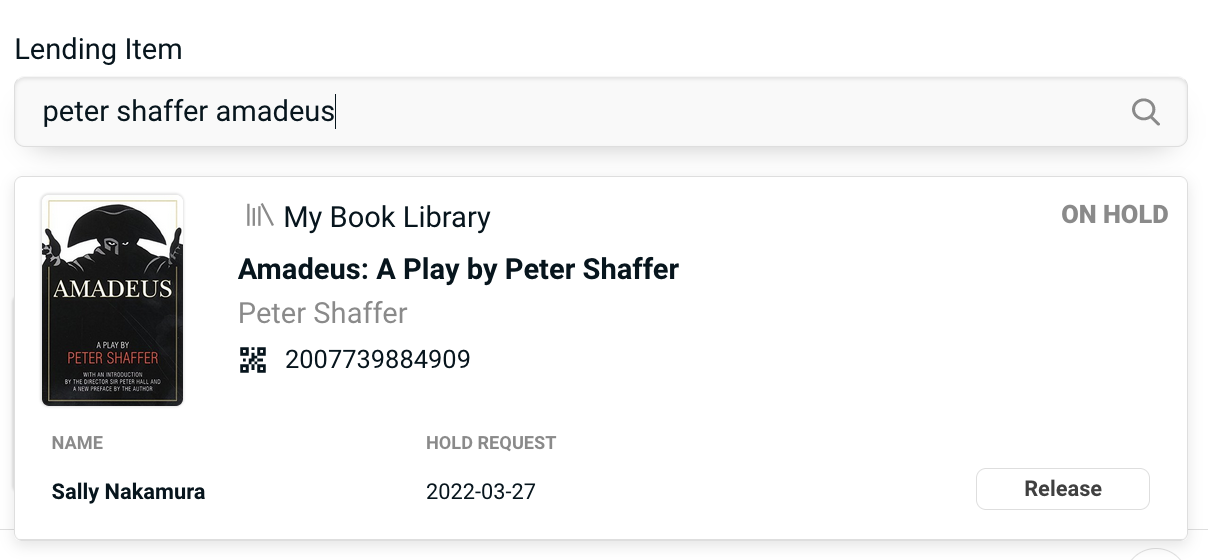
If the item has an active hold on it, you will be warned before it is added to the queue. If you are checking out a held item to the patron it is being held for, then the hold is automatically released on a completed checkout. If you checkout the item without releasing the hold to a different patron, the hold remains. If you release the hold, the patron will no longer have a hold on the item.
Check In Mode
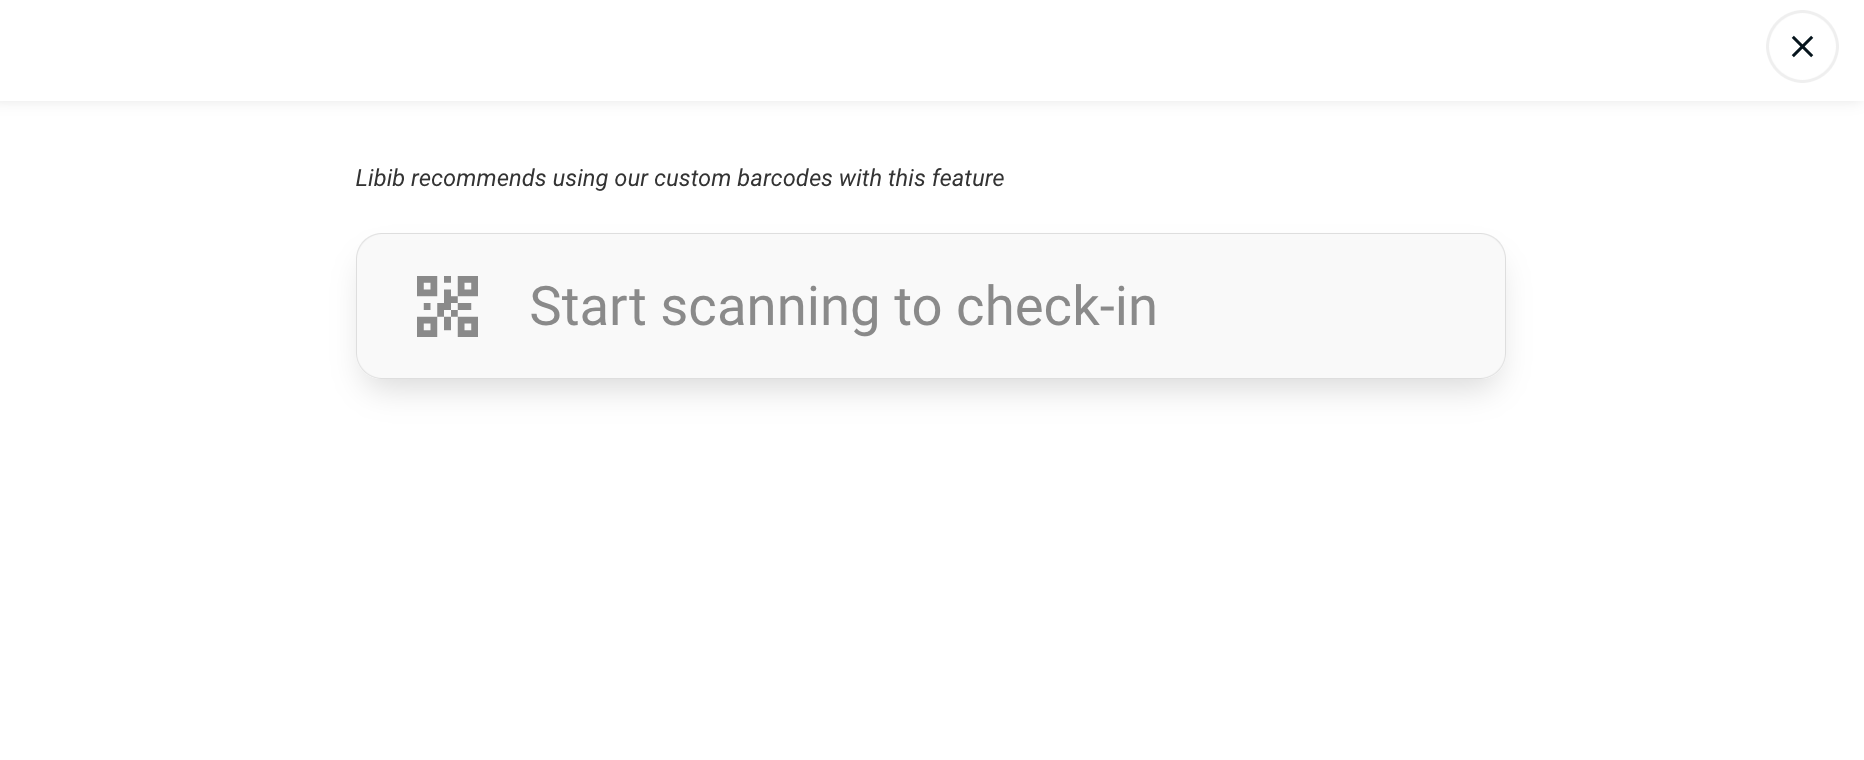
For a quick way to check in items, use the Check In Mode with a physical barcode scanner.
Check in mode is a simple input box. As you scan items in, the item will briefly appear below the input box to verify that it has completed the check in process.
Works best with Libib's custom barcodes, but can also use the item's ISBN/UPC.
If you are scanning in a non-custom barcode which has multiple copies, Libib will prompt you to choose the specific copy to check in.
Checkouts
The checkouts page is a running list of checked out items, along with details about due dates, the patron it was checked out to, and the ability to check the item back in.
Lending > Checkouts
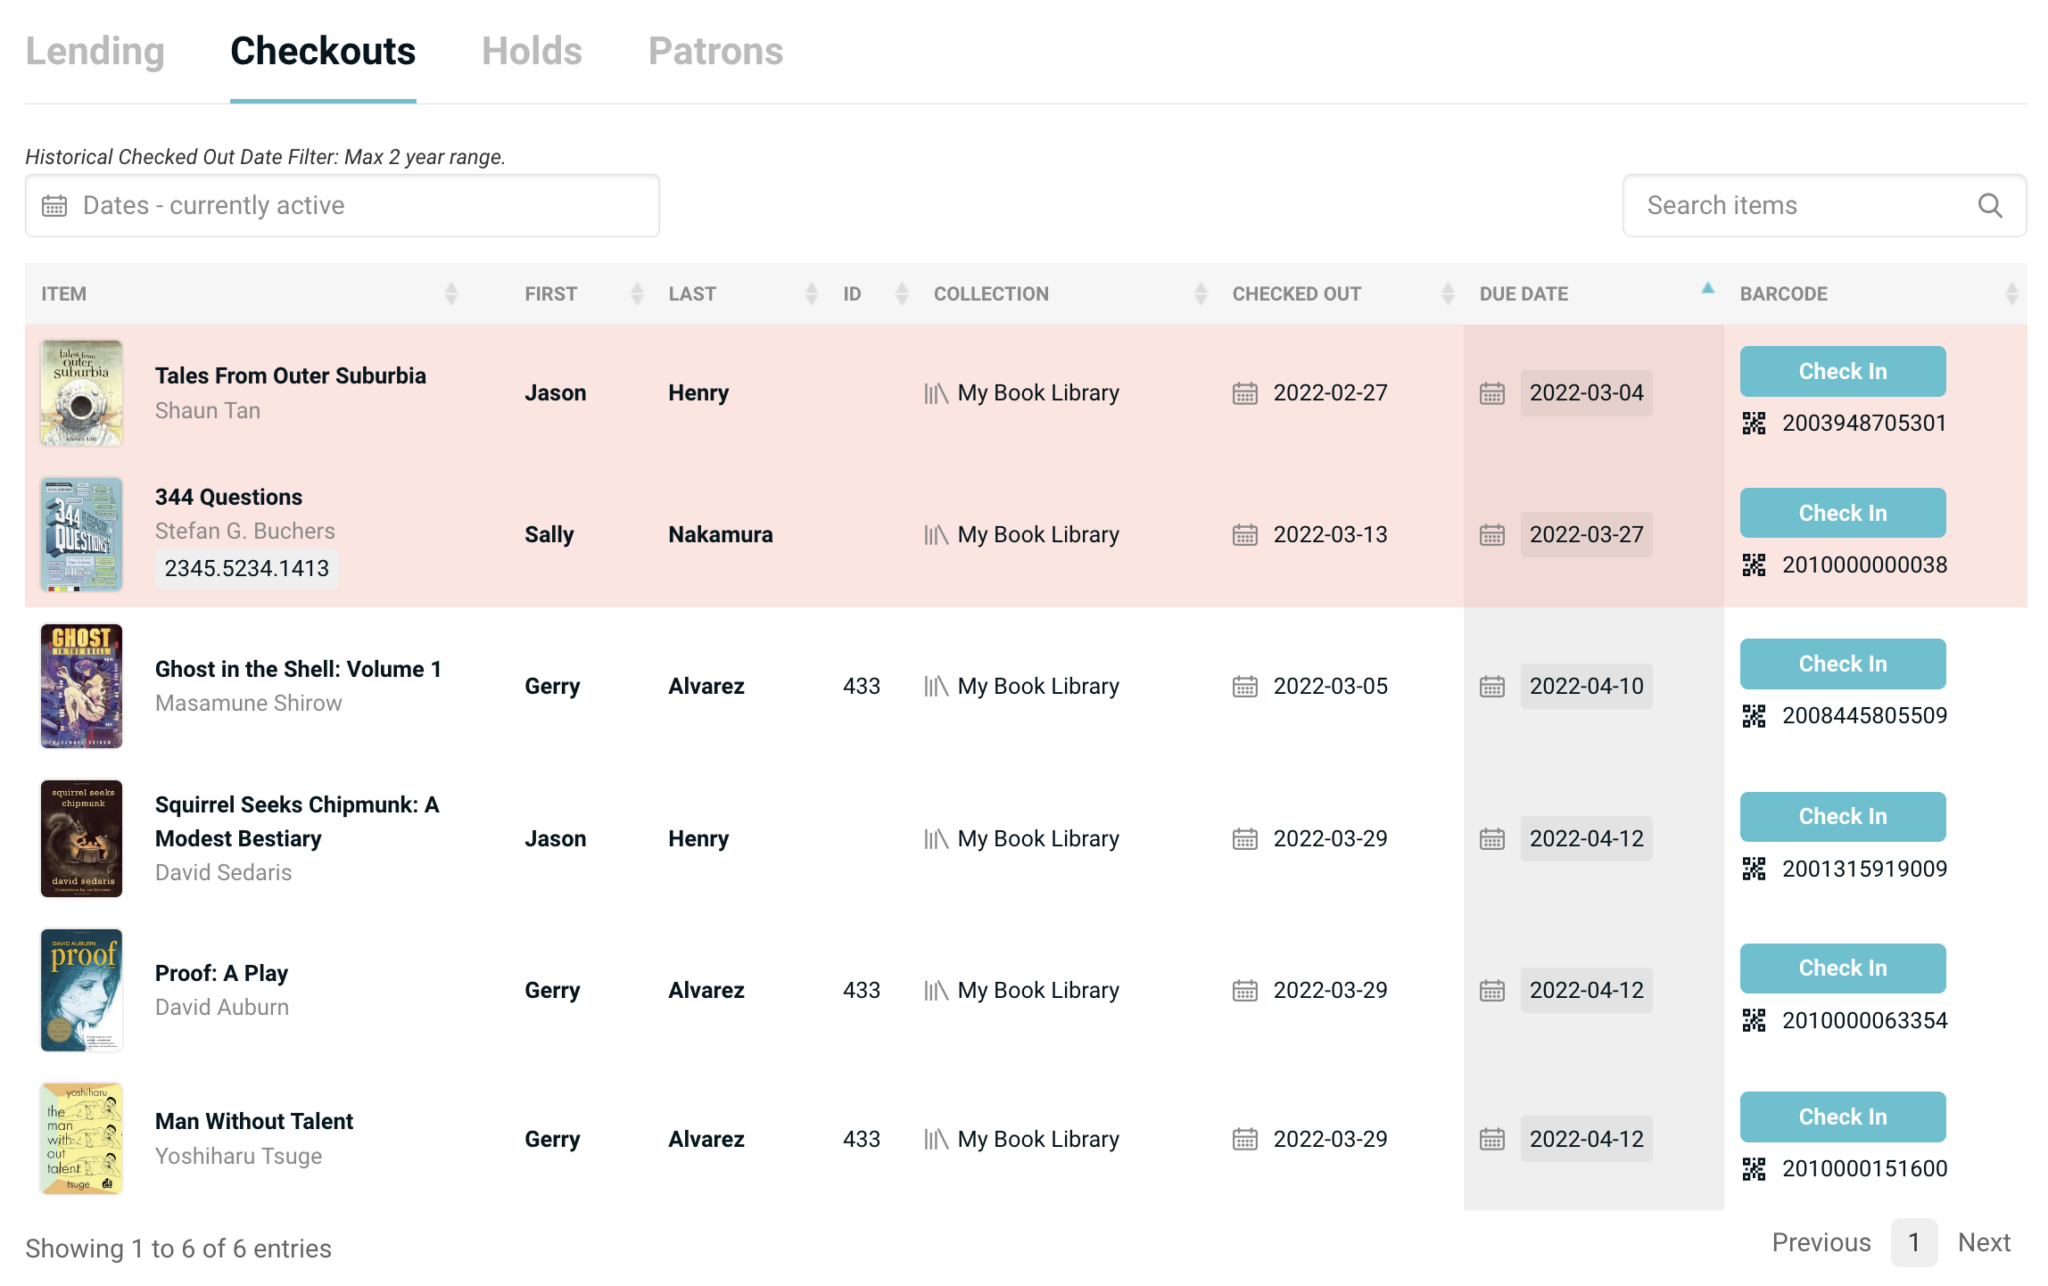
Items are listed in order of date due by default, with the item due soonest at top. Items that are past due will be highlighted in red.
Click on any of the header values to change the sort order. For example, clicking on Last will sort the checked out items by the last name of the patron.
Items can be directly checked in from this page by clicking on the Check In button.
You can search through previous checked out items by providing a date range in the Historical Checked Out Date Filter. This will allow managers to view up to 2 years worth of previous history.
Holds
Holds is a running list of items that have been placed on hold by, or for, your patrons. You can view the item on hold, the patron that has placed the hold, the collection the item is from, as well as the date the hold was placed.
Lending > Holds
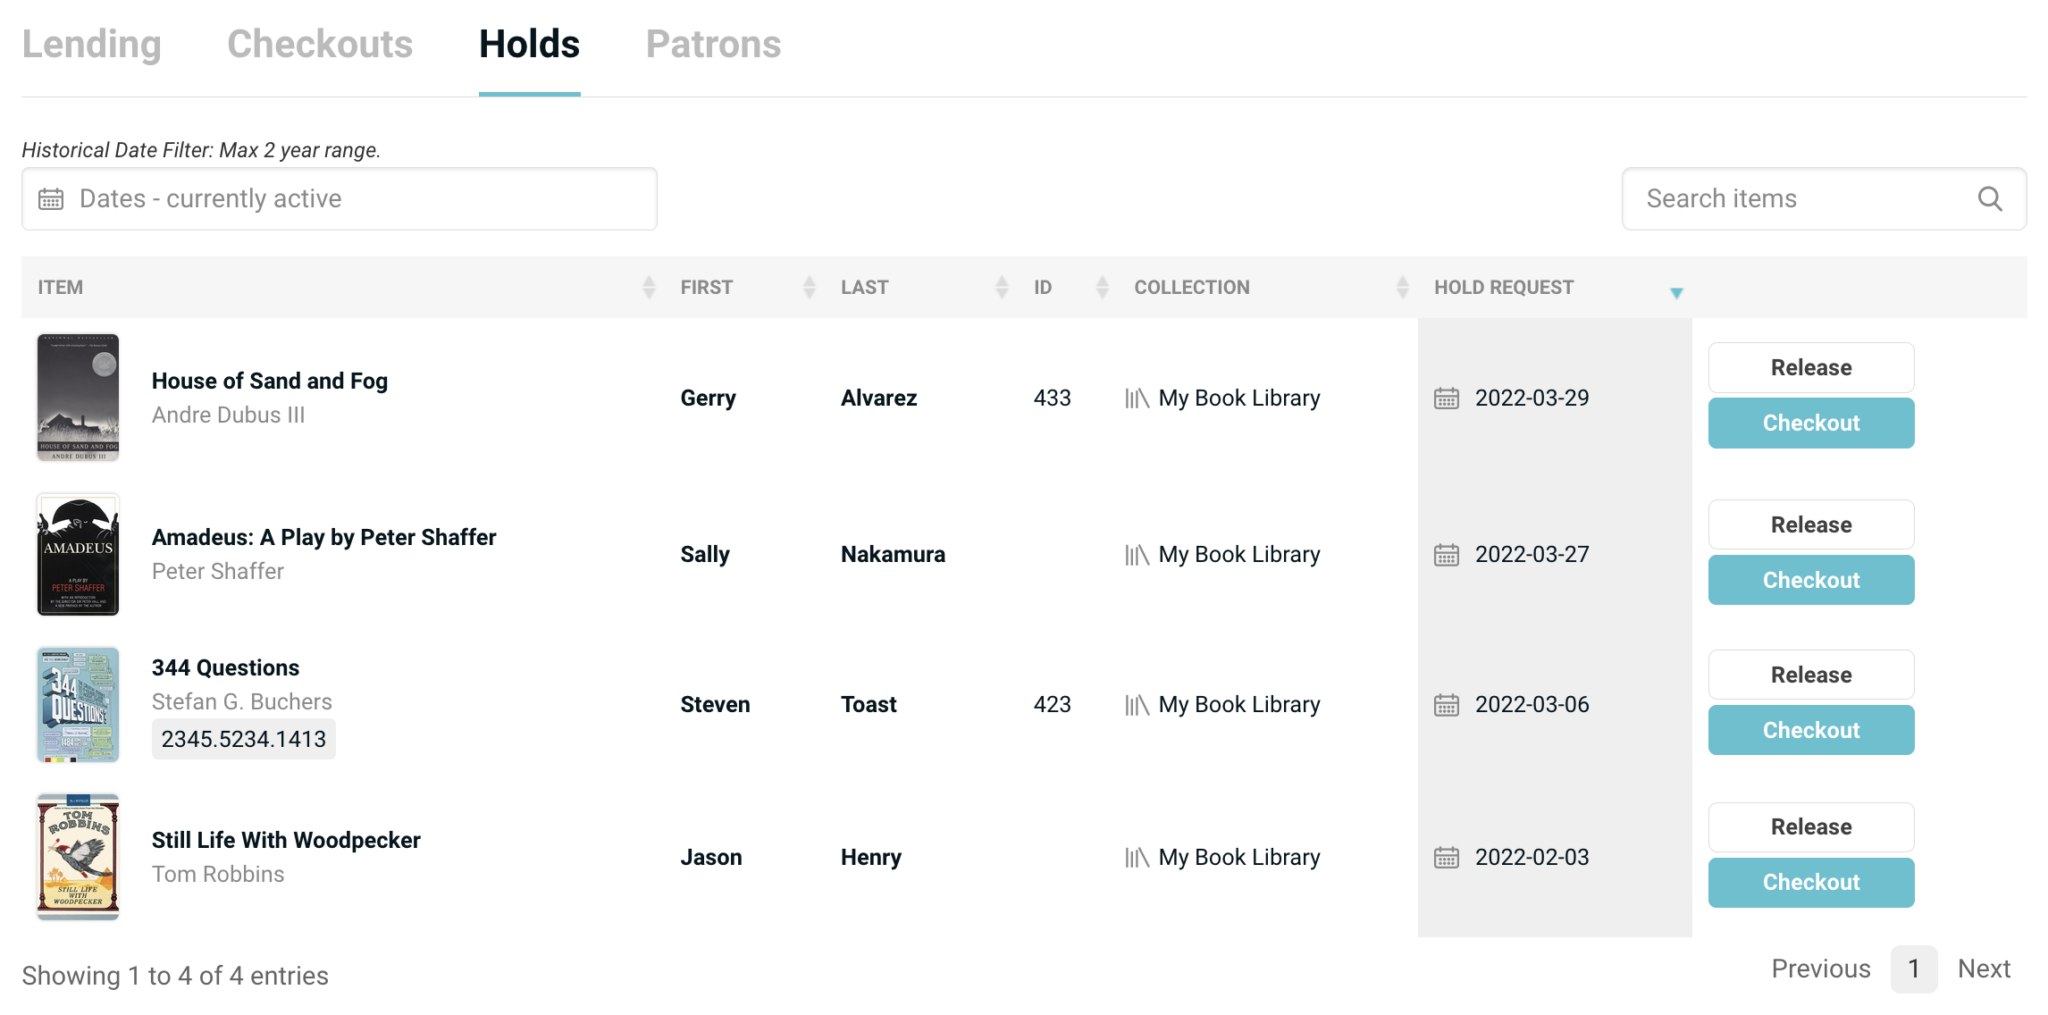
You can search through previous held items by providing a date range in the Historical Date Filter. This will allow managers to view up to 2 years worth of previous history.
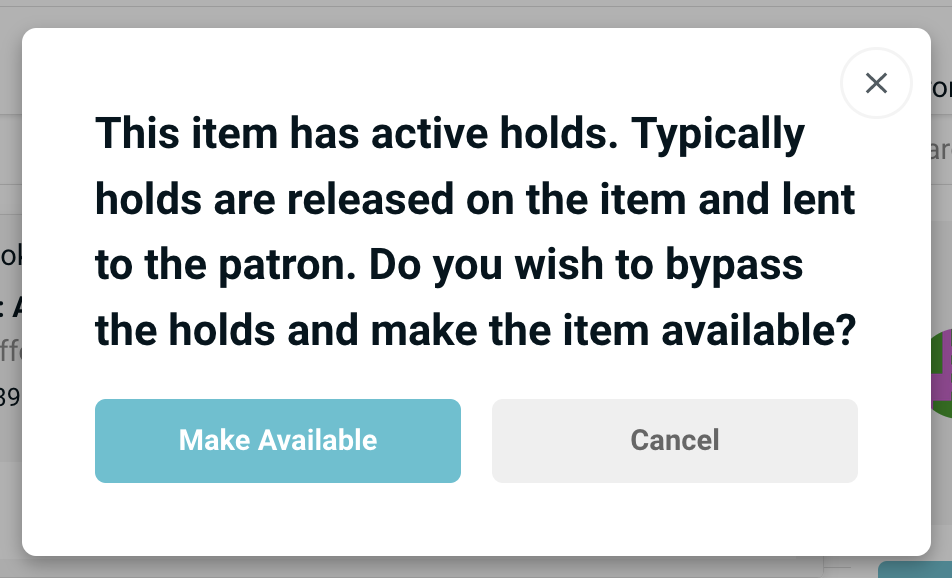
When an item is placed on hold, and there are no additional copies to lend out, you will not be able to check out the item without first releasing the hold – or overriding the hold by making the item available. This can be done from the lending page for quick and easy access.
When you Release a hold you are either about to lend the item out to the holder on the lending page, or you are no longer going to hold the item for the patron. (Making the hold available on the lending page allows you to keep the holds in place, but still checkout the item.)
Checkout from the holds page will simultaneously release the item and check it out to the patron.
For patrons to place holds from your published library, you must turn on that ability in the published library settings.
If an item is checked out when a patron places it on hold, they can be automatically notified when the item is checked back in. This setting too must be turned on for your published library in the published library settings.
Holds long-term auto-release
Libib will automatically release holds after 4 years. The system assumes that an exceedingly long hold is either forgotten or not needed and it is part of the system clean-up.
Patrons
The patrons page is a running list of all your patrons, displayed along with some of that patron's relevant metadata.
Lending > Patrons
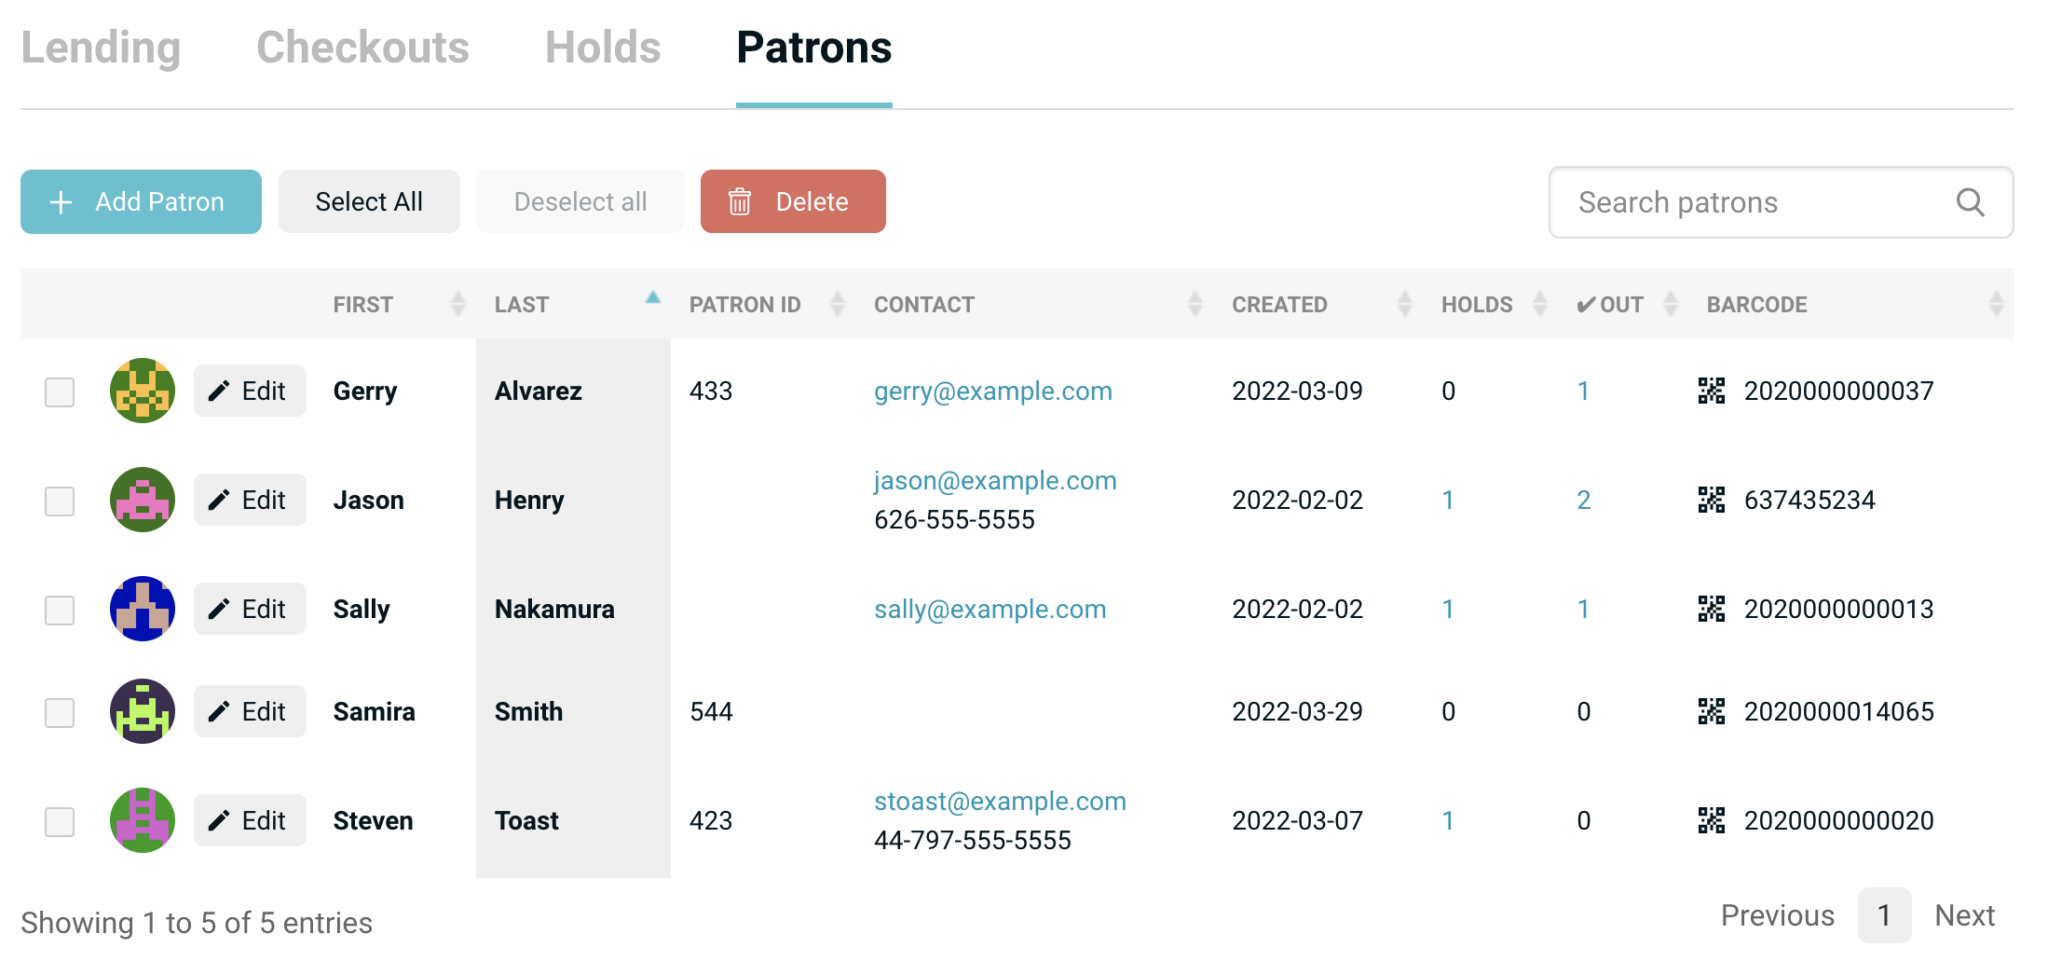
Search for a patron by name, email address, barcode, patron id, or tag.
Add Patron button brings up a form that will allow you to create a new patron. There is also the option to import via CSV.
Edit a patron from this page by clicking on the edit button next to a patron's name.
Delete by selecting the checkbox next to a patron, and clicking on the delete button.
Holds: Shows the number of active holds a patron has. Clicking on that number will link to the holds page and auto-filter just the items for that patron.
✔Out (checked out): Shows the number of active checkouts a patron has. Clicking on that number will link to the Checkouts page and auto-filter just the items for that patron.
Patron History
Clicking on the patron's gravatar image will bring you to their Patron History page.
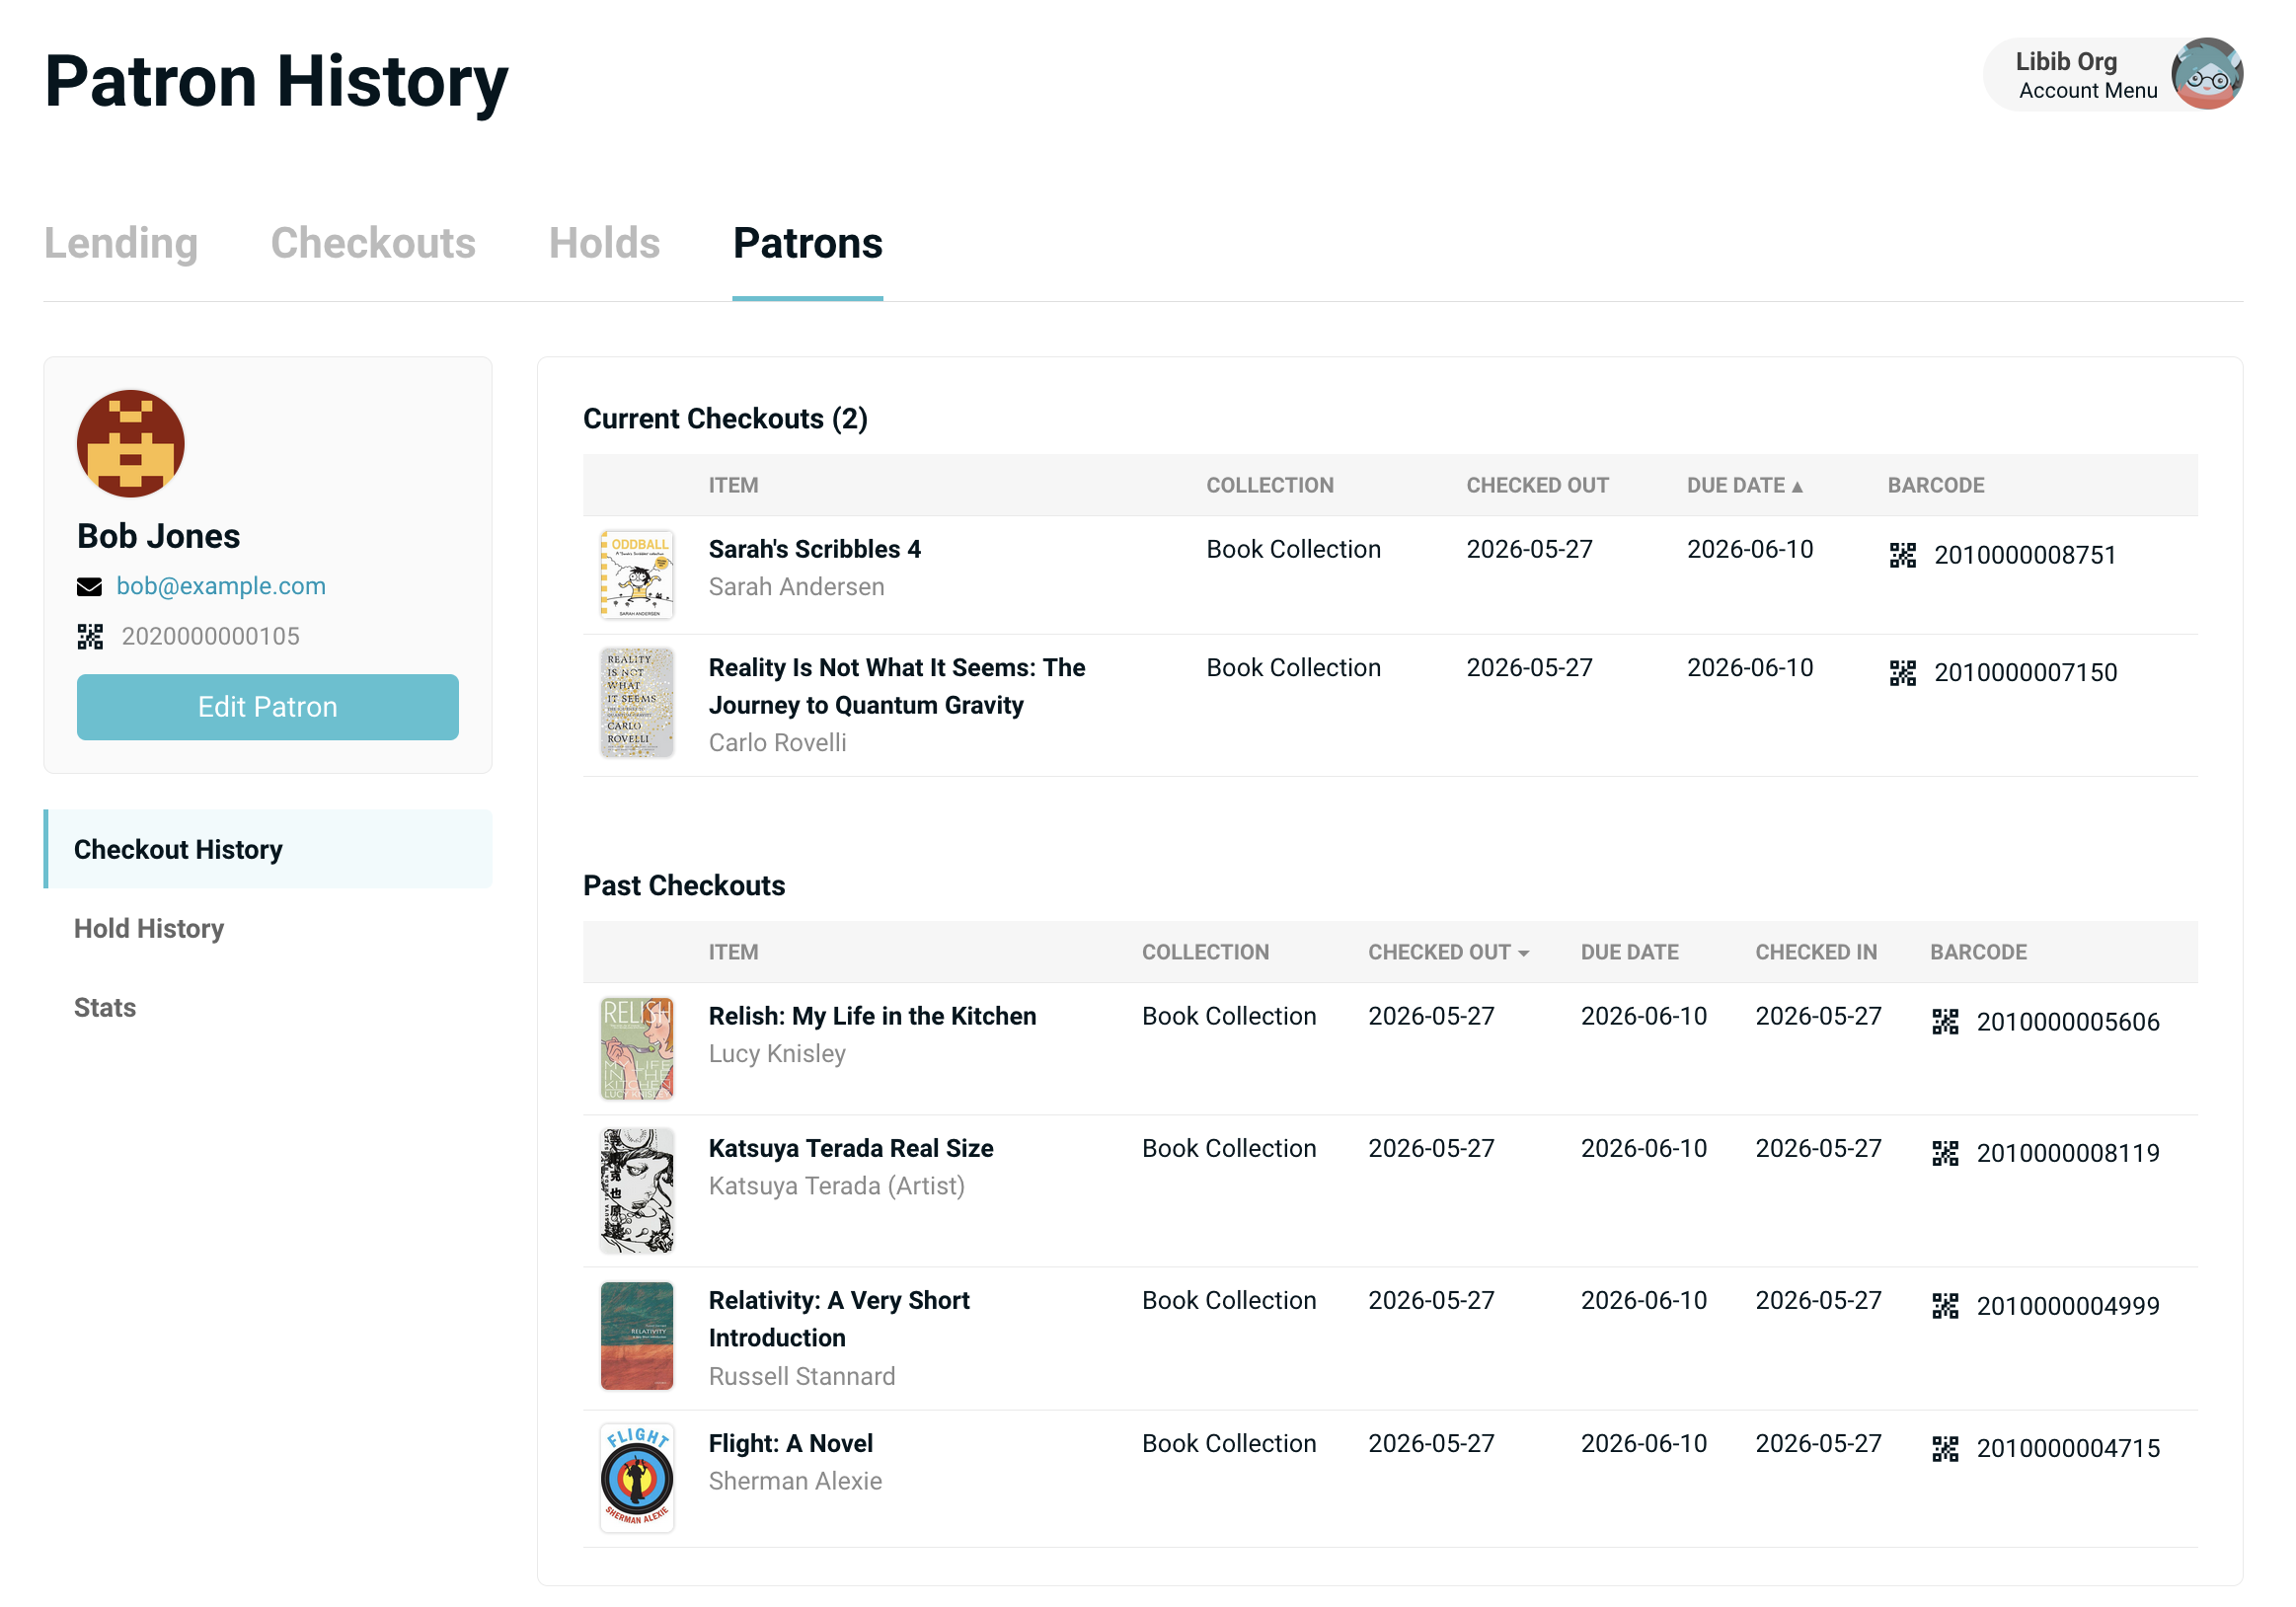
The Patron History page gives you a complete view of a single patron's activity in your library. At the top you'll see the patron's details, followed by their current checkouts and any active holds they have placed. Below that, you can review their past checkouts and past hold history, with a "Load More" option to page through older records as needed.
The page also includes a Stats tab summarizing the patron's borrowing activity, defaulting to the last month with options to switch to other date ranges.
Only checkouts and holds from collections you have access to are shown, so what appears here matches the scope of the rest of your Lending pages.
Add Patron Form
From the Lending > Patron page, click on Add Patron to enter in a new patron's details.

The field options on the add patron page:
First Name: (Required) The first name of the patron.
Last Name: (Required) The last name of the patron.
Email: (Unique) The email address that patron can use to login to their account (if that option is turned on). If no notification emails are set, then this email is the default notified email.
Notification Emails: (Non-unique) Up to 3 different emails that can be notified for holds, past due and coming due notices. Once a notification email is entered, it will be used instead of the main email for notifications. If the email and notification email are the same, then there is no change in notification functionality.
Patron ID: (Non-unique) Allows you to assign searchable IDs to a patron.
Barcode: (Unique) Libib auto-assigns a patron barcode for every patron. This can be overridden, but Libib does not recommend doing this and we are unable to provide support for issues with non-Libib barcode numbers. Numbers only – between 5 and 15 digits.
Tags: Searchable tags to help filter patron list.
Phone: Patron's phone number.
Address: Address1, Address 2, City, State, Country, Zip Code
Freeze: Prevents a patron from self-checking out or placing holds on any items. A manager can still check items out or place holds for this patron, but the patron's ability to do it themselves through the published site or the kiosk is removed.
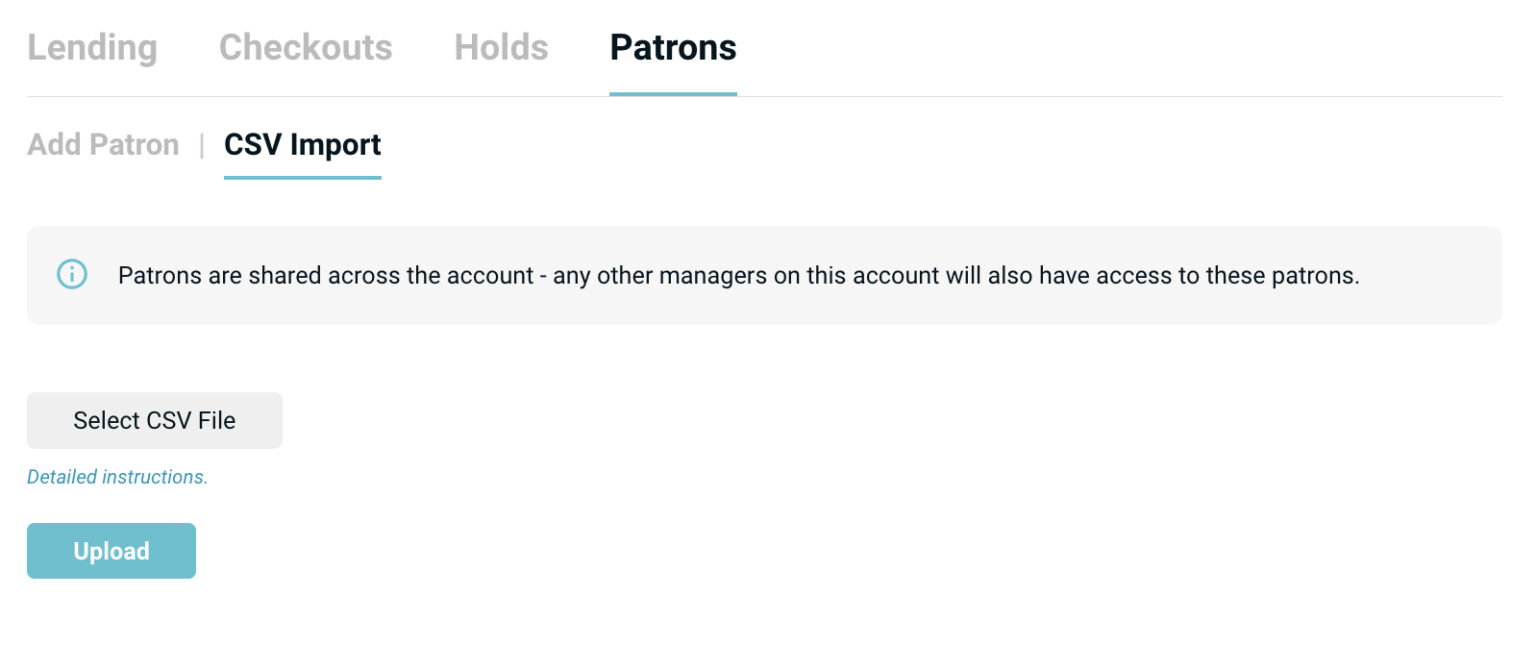
CSV Import
Click on the CSV Import header to arrive on the csv import page. At a minimum, a file must include a first and last name (formatted in the csv file header as first_name, last_name). Emails, if included, must be unique, or the patron will be skipped.
UTF-8 encoding
If there are non-latin characters or diacritics (this includes apostrophes) in the CSV file, you must ensure that the file is UTF-8 encoded for the import to work properly.
Once a csv file is uploaded, you will be directed to double-check your values and instructed to align your column headers with Libib's values. Column headers that can be matched have a check mark next to them. Column headers (such as patron_notes below) that have no equivalent in Libib, are greyed out and not imported.
You can use the drop-down menu to assign the Libib value for a column header if they are meant to match. Example: If you have a column header called contact which represents the email of a patron, you can assign that column to Email.
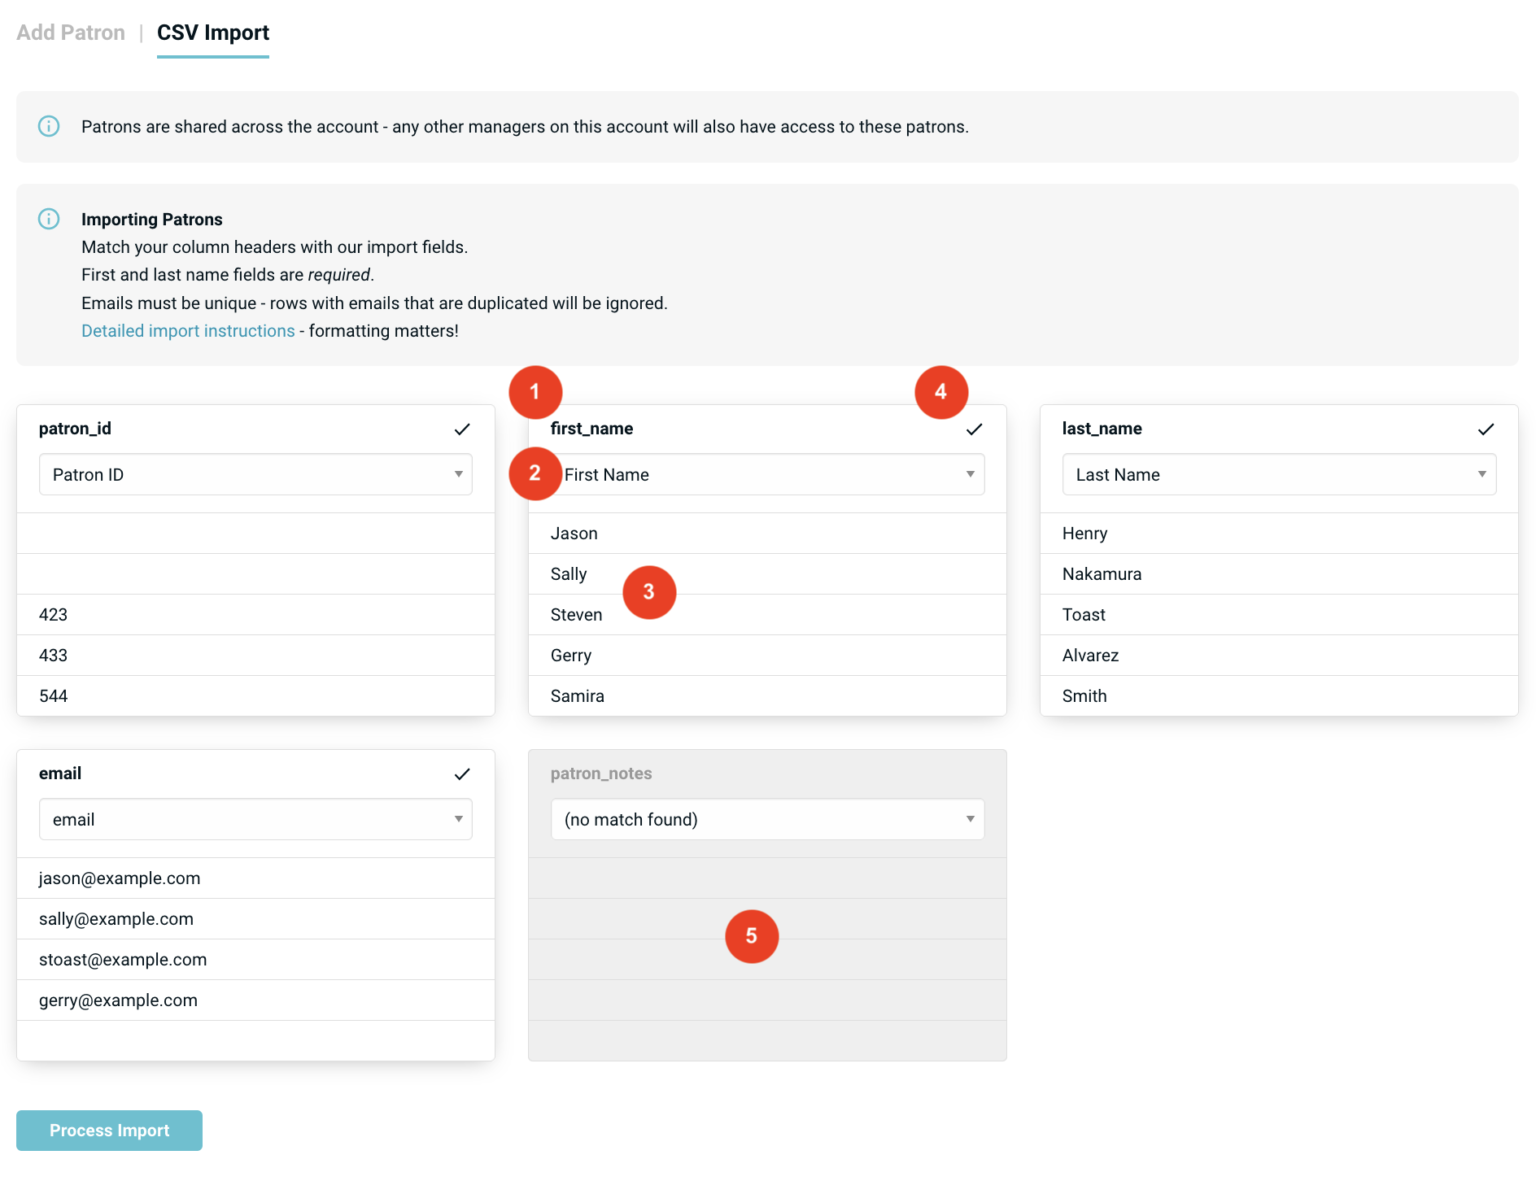
- The name of the CSV column.
- A drop down list of possible matches for this column. This is the field that Libib recognizes this column as.
- A preview list of the first 5 rows of data for you to review.
- A check mark indicates that this field will be imported.
- A gray background means the column name was not matched and will not be imported.
REST API
Patrons can also be added through our REST API. Generally some knowledge of programming is required to use this approach.